
Fusion Generator:Kresty Style Build:3D Parts
Back to Kresty Style Build guide page.
3D Printed Parts
Kresty's Guide is based on Kresty's modification of the 3D parts - which, admittedly, are nearly like SavageCreature's :)
The 3D parts files are available from the 3D Files Section.
Basically for the 3D Parts there are 11 of everything on the top and 8 of everything on the bottom.
I'm splitting this into Base 3D Parts, Top, and Top Greebles.
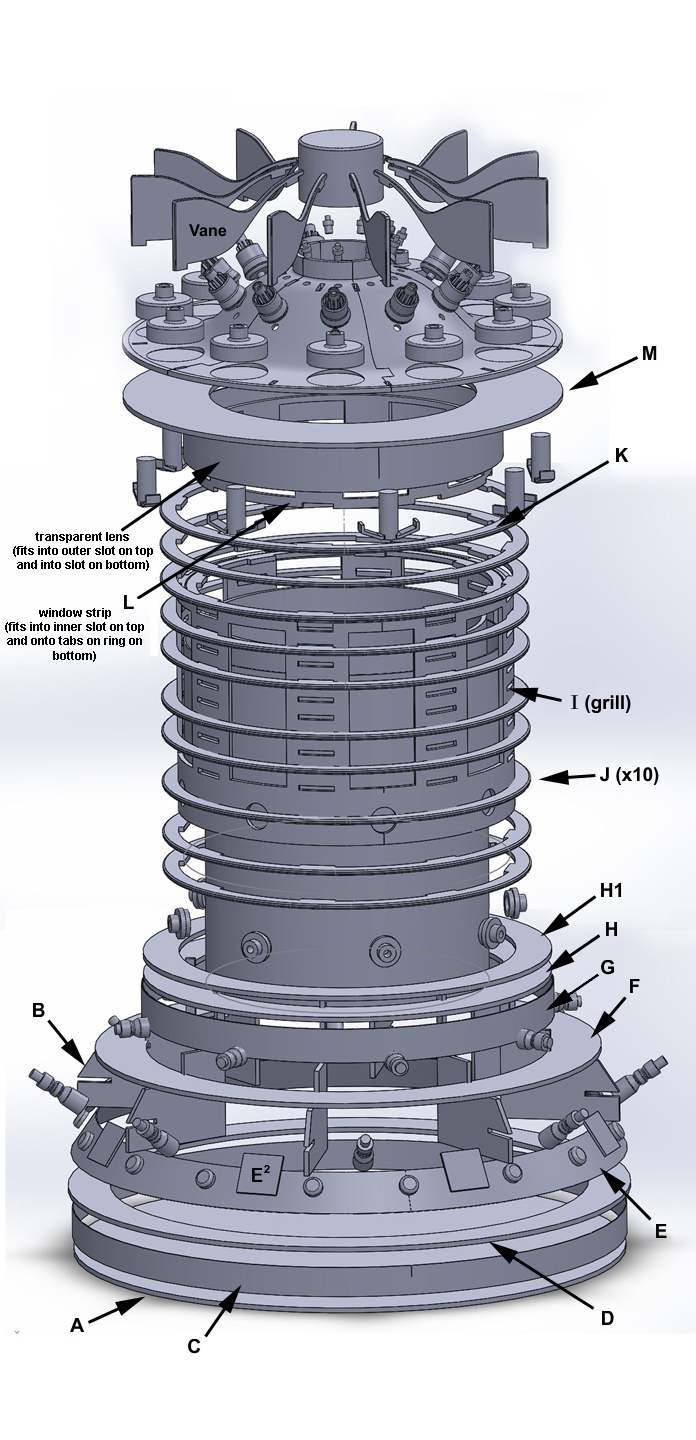
Base 3D Parts
Most of the base is built from the flat-pack parts, however the Greebles are 3D printed. You will need 8 of each part (16 buttons):
- 16 Buttons (on E Band)
- 8 Round Caps (on E Band, alternate for E² squares)
- 8 Lower Hose Long Angled Nipple (on E Band)
- 8 Lower Hose Short Nipple (on G Band)
- 8 Upper Hose Mount Tee (on M Ring)
These two parts need printed from translucent filament if possible.
- 8 Upper Hose Nipple (in Tees on M Ring)
- 8 Upper Hose Mount Main (on I grill)
One alternate part is also provided "Special Angled Nipple" and "Special Post" - Those are designed to replace one of the Lower Hose Long Angled Nipples if you would like to conceal small jack, such as Kresty did with the 1/4" jack.
All of the lower parts should be printed at .1mm or .2mm layer height, perhaps print one of each at .2mm and see if you're happy. Most everything is intended to be able to print flat without supports.
- Buttons - flat side down
- Round Caps - flat side down (upside down)
- Nipples - bigger flat base down
- Upper Hose Main Mount - bigger side down.
- Upper Hose nipple - on one end
The Tee's will need supports.
- Tees - Broad side down with support
The "Special Long Angled Nipple" is split into the main part and a post that fits inside so that both can be printed without support, or at least with minimal support
I printed most of them with respectable infill because they will need to secure the hose.
Top "Fan"
Note: vanes are laser cut for Kresty's Build.
The main part of the top consists of 11 segments and one top cap. A couple variations are included in the "Alternate Top" folder of the 3D parts, however it is recommended that the "Extra Supports" versions are used, printed on their edge.
- 5 Top Double Segment (Extra Supports)
- 1 Top Segment (Extra Supports)
- 1 Top Cap (Modified)
Alternatively, you may print 11 of the single segments.
The top segments and cap may be printed much faster at .2mm layer height than at finer resolutions, particularly if you plan on using putty or thick primer. The recommended files are designed to print without additional support.
The top cap may be printed upside down, or the "modified alt" version right side up, without support (there's a cone inside).
Only minimal fill is needed for the top parts.
One person with a large printer printed the entire fan section in one part. Not particularly recommended as that would require printing flat, which would exacerbate the layering effect.
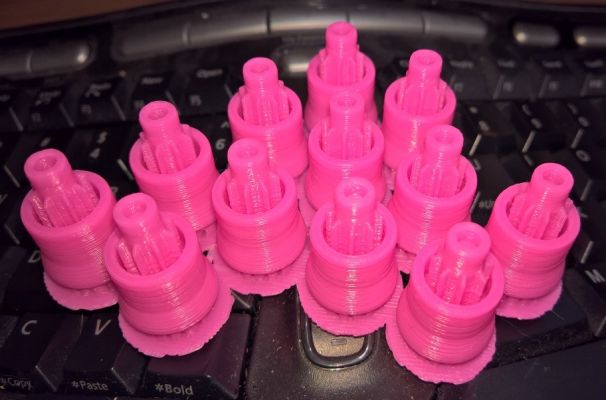
Top Greebles
There are 11 of each of the 3 top greeblies. Kresty's version of the 3D files include small holes in the middle of the top coil socket and top coil mount to insert the end of the coil wire. There is an additional "heatsink" between the coil mounts.
Note that the heatsinks can be printed in 3 parts to avoid supports and make it easier to paint the inner portion before assembly. Alternatively they could be printed as a single part.
- 11 Top Coil Socket (on top near middle)
- 11 Top Coil Mount (on top near edges)
- 11 Top Heatsink (in middle of each top segment)
- Top Heatsink A (lower portion)
- Top Heatsink B (fins)
- Top Heatsink C (mounting post)
All upper greeblies can be printed without support at .1mm or .2mm layer height. Nothing is structural here, so infill can be minimal, like 10%.
Extra
As mentioned, a "special" angled nipple is provided, which might work to conceal jacks with the cord.
Additionally, I printed "hooks" that I glued inside the grill I and window strip L to allow rubber/elastic bands to connect my top and bottom. If you don't mess up and glue the top to the M ring like I did, then this shouldn't be necessary.
Notes
In my version I used the Laser Cutter (could use a CnC) to cut the vanes. If you want to print the vanes, you can get the 3D files for those from Savage's Files.
Back to Kresty Style Build guide page.
Forward to Flat Pack Styrene Parts